1.0___The garden clear out___
The garden was full of rubble/concrete, plants and bushes and the beloved magnolia tree. My wife and I spent a hot minute tying to sketch a vision where the tree would remain… We reluctantly concluded that it needed to be removed; there were too many complications and regulations with building at the end of our house, and a drawing of a uniquely shaped studio down the side of the garden/tree simply commanded too much square footage and compromised any remaining garden area. So, with the help of a friend, Andy, and ensuring the two nests resting high in the branches were indeed dormant, we removed the tree manually, before it came into bloom! Time was of the essence. Eight or nine trips to the recycle centre, several full garden waste bins and a full 8 yard skip of earth later, two thirds of the garden has been cleared out; all wheeled through our lounge and hallway with the help of my father-in-law, Mark.


2.0___Foundations___
I decided to opt for ground-screws to build my studio upon. They are a very safe option, albeit the more expensive choice; but the more sustainable option too over using concrete, and I could be absolute certain they were level, and unlikely to give me any issues moving forward. Having them installed by The Ground Screw company gave me the peace of mind to build confidently on sound foundations. This meant building the timber frame on top was an easier job too. I added battens and sheet material to the bottom of the frame, to help rodent-proof the underside. There are pests everywhere round here. I then insulated the frame with 60mmm celotex before adding a VCL layer, and finally the 18mm OSB3. During this process I started my 450mm trench containing: pea shingle, a grey waste pipe and a blue water pipe, ensuring the trench had a suitable gradient taking the grey pipe waste down the garden to the man hole. Ultimately, the studio will have running cold water. And not forgetting to bag up any clay I discovered in the ground; I will use it later!


3.0___Walls___
I absolutely loved this stage of the build. Once the measurements were all sorted, it was pretty straight forward from that point onwards and more enjoyable once I’d found a nice flow when working. Making sure the apertures for the window and door remained correct, and the overall frame was square and level. I think starting from ground level using ground screws, and having that early piece of mind that the build was starting perfectly level, really helped minimise any catastrophes at any forthcoming steps. I then had the help from another friend, Lloyd, who kindly offered to help me assemble and erect the heavy walls into position.
I made a major alteration at this stage also. Swapping 6x2 rafters for 4x2 rafters, coach bolted together. The coach bolts added to the overall ‘workshop aesthetic’, a fortunate bi-product really of the necessity of the doubling up of two beams. Making big changes during a project of this size is never ideal, and this is often when I spend a lot of timing thinking, and not a lot of work goes on, but that’s the way it is. This was due to a small panic my room was potentially going to exceed the 2.5m height allowance.
And lastly, in addition to insulating foundations I also insulated each wall and the roof, seeing as I wasn’t planning on installing any heating. So the heat from my overnight kiln firings would hopefully hang around for the next day. I used 60mm Celotex board again which is very easy to cut down and fit between noggins, then fastened with foil tape.


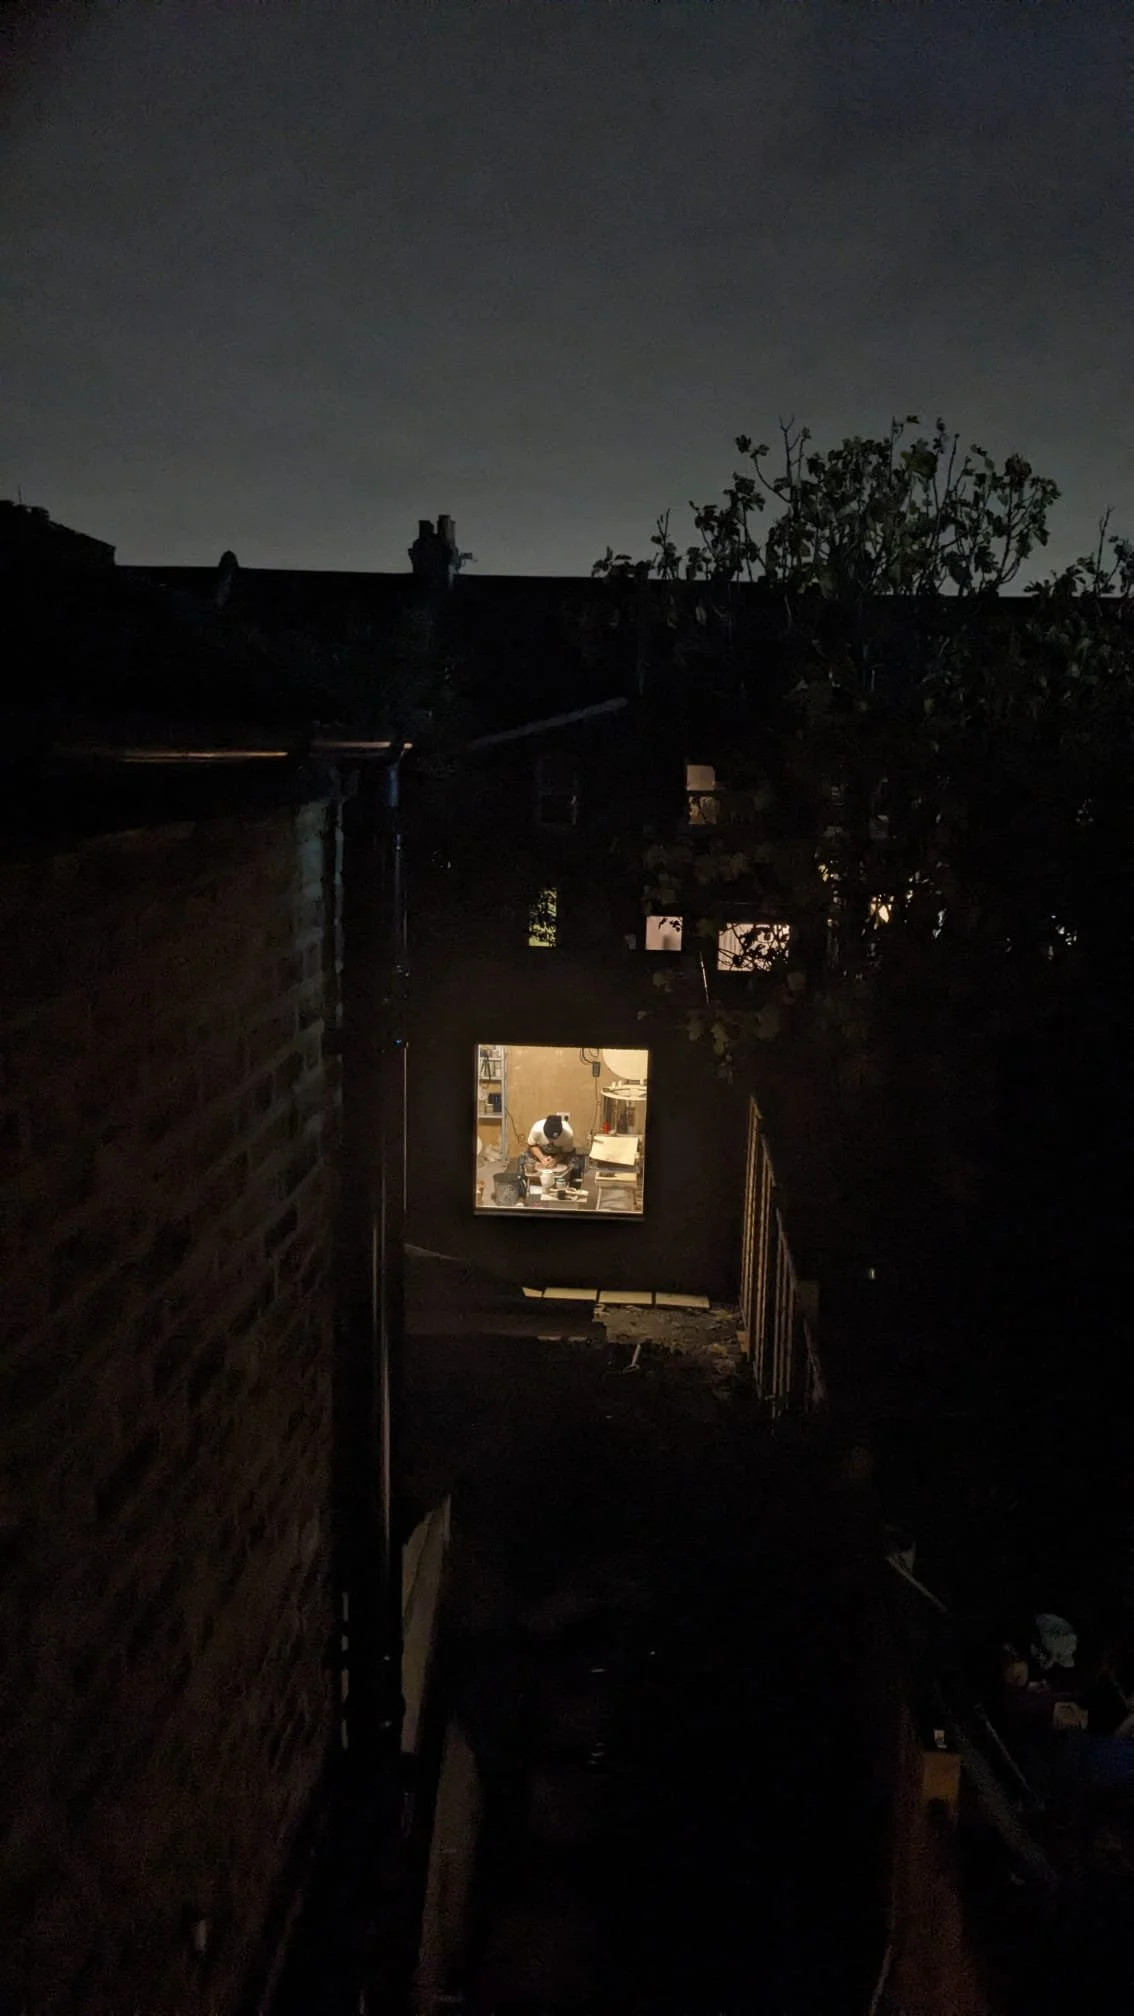
4.0___Roof___
My build was to have a warm-room configuration which basically means the insulation sits above the roof deck in a separate sandwich of plywood. In total, the roof required eighteen sheets of 1.2m x 2.4m plywood, six sheets per layer. All of which had to come through our mid-terrace house. Furthermore, the roof contains six 1.2 x 2.4m sheets of 60mm insulation, firrings, a membrane, breather membrane, and not forgetting the rubber roof above everything else. This was probably the most hectic period of the build, as I was in a hurry to beat the weather and get the room water-tight as quickly as possible. Lots of awkward lifting. Fortunately, my father-in-law, Mark, was on hand to help lift all the wood into place, before cutting and fixing. It was a particularly enjoyable day.
I fit the rubber roof finally on one of he hottest days of the year. A mistake by all accounts. The adhesive used to glue the rubber to the upper layer of ply instantly dried, making the entire rubber installation a race I won by the narrowest of margins.


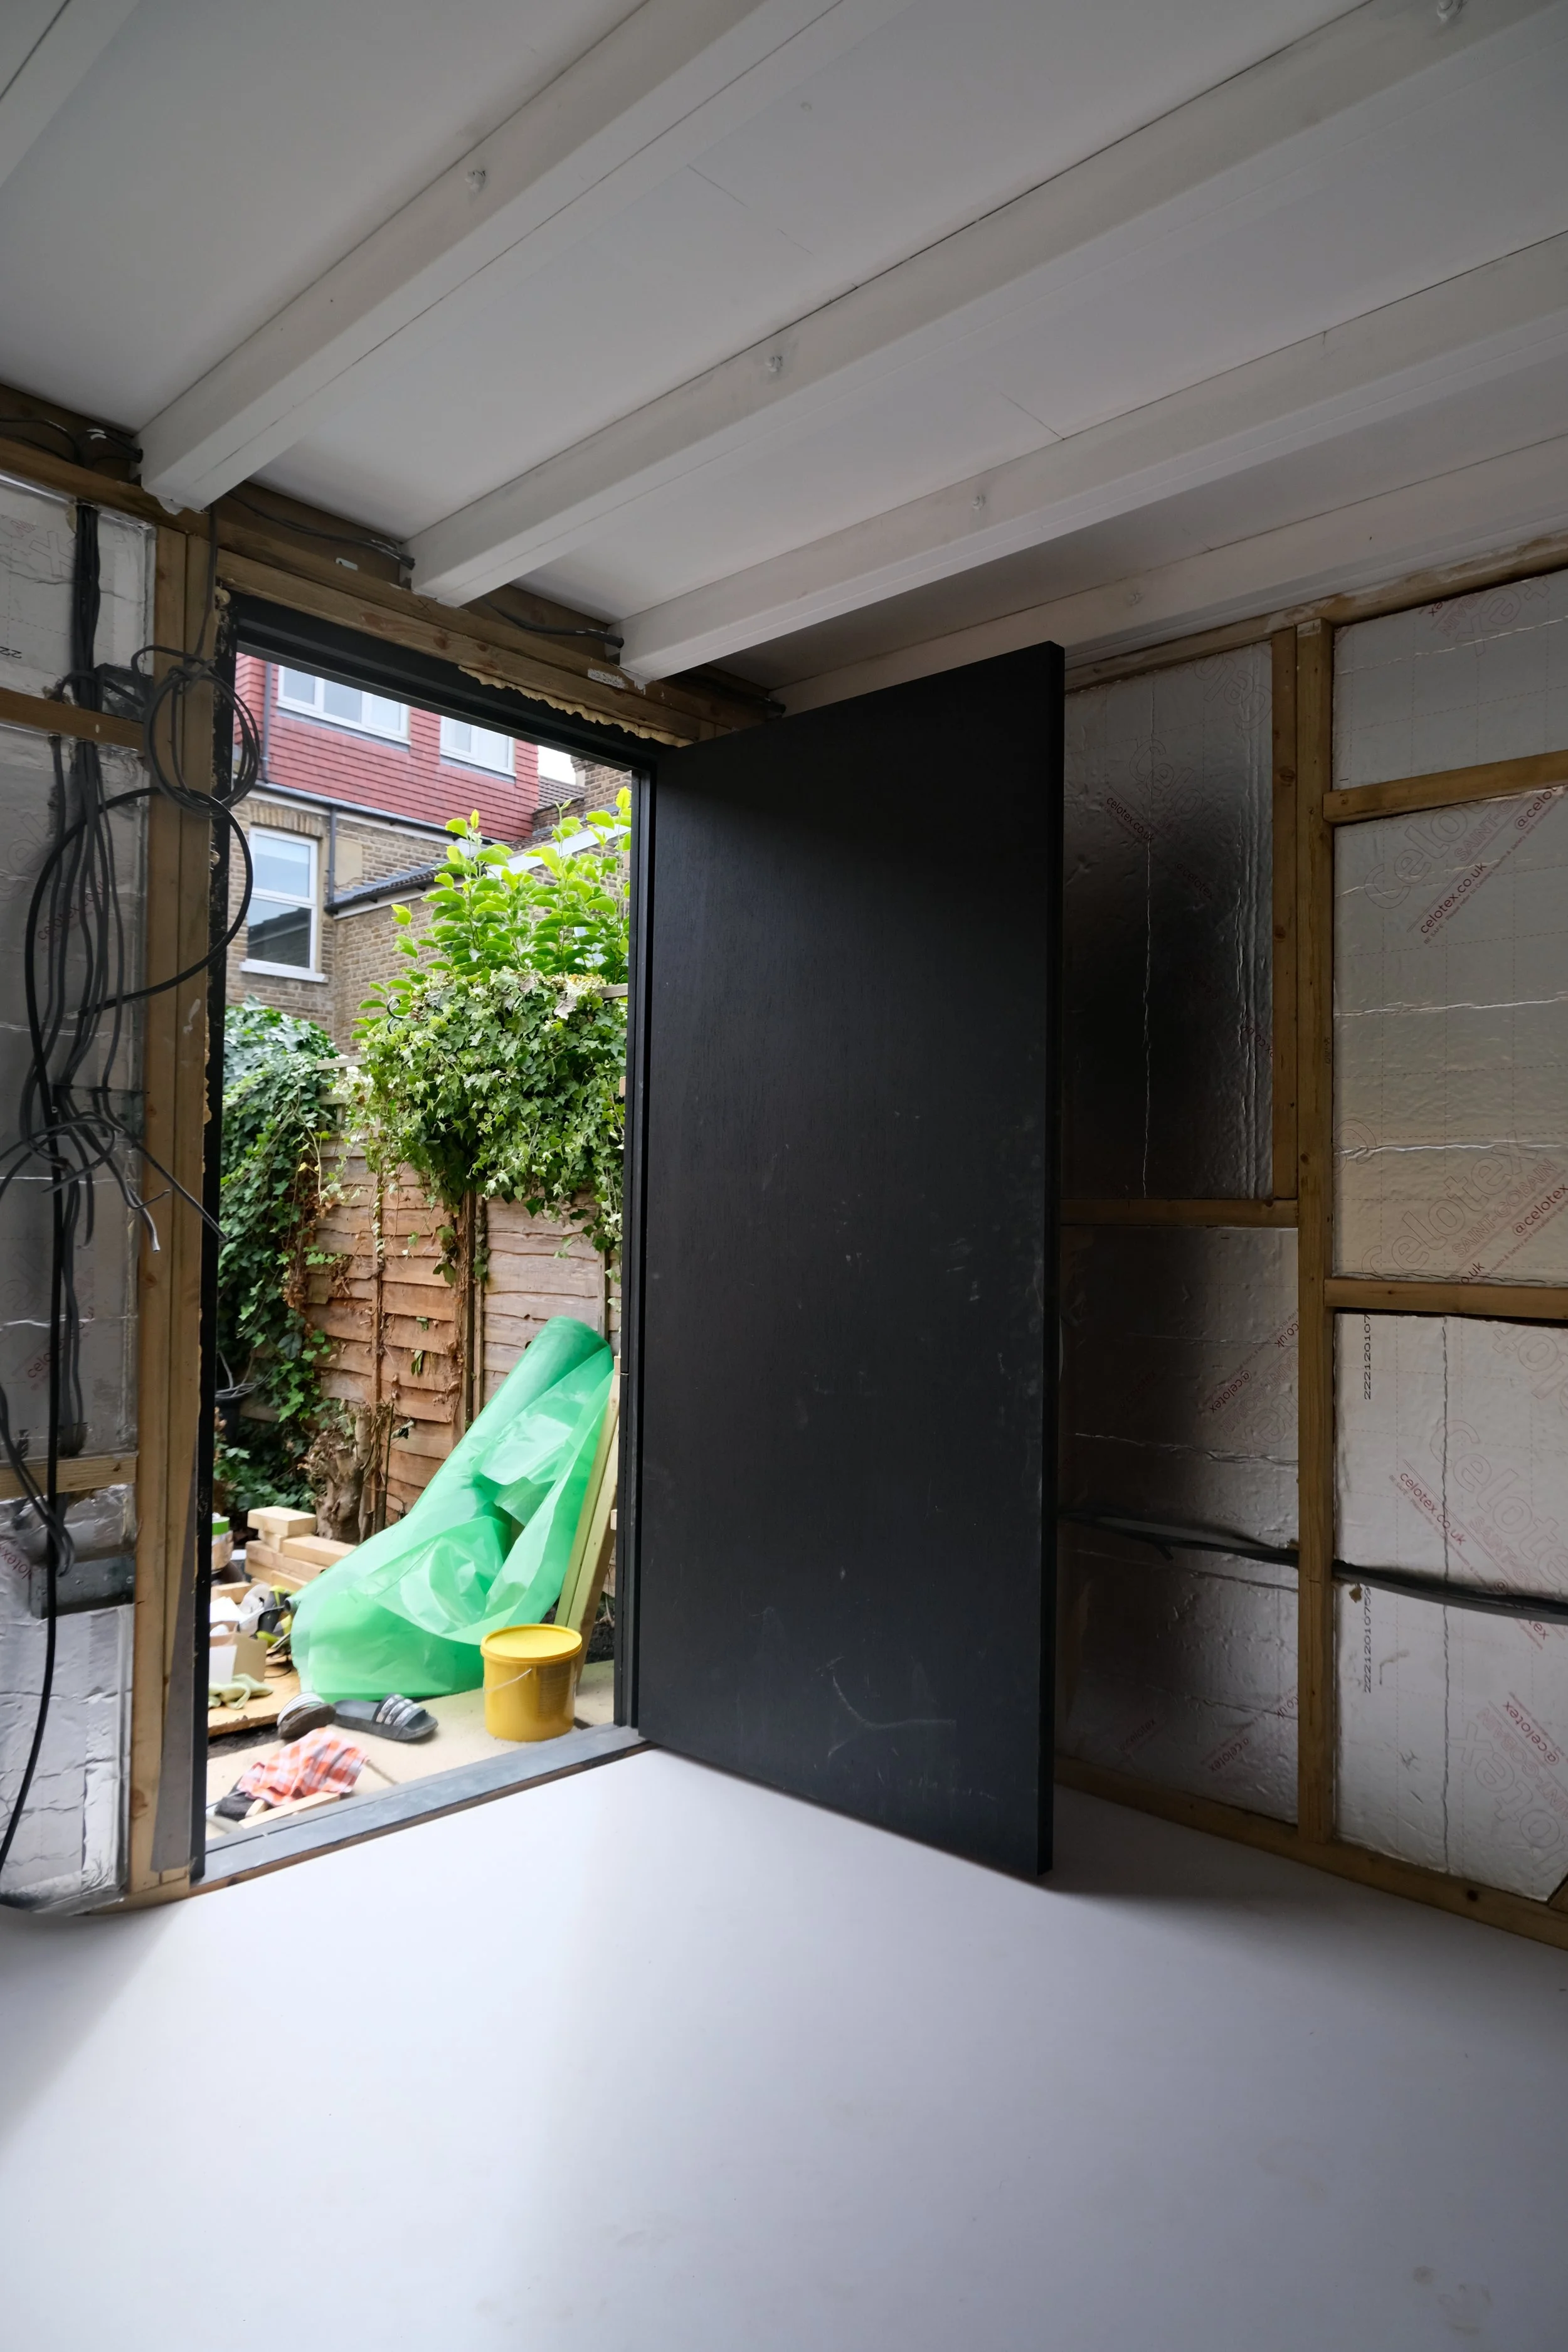
5.0___Window & Door___
The big ticket item was a 1600 x 1600 fixed wooden window with re-enforced glass. The concept was simply to have a very large picture window where I could sit working on my wheel, framed by the window, staring back down the garden. With it being so large it was needed to be fixed, therefore it couldn’t be opened, which has it’s pros and cons. However it’s secondary purpose was to bring significant natural light into the studio, to aid shooting my work.
Conveniently, I had befriended a local drone pilot (?) to take a handful of aerial shots of the foundations and later once the walls and roof were up. He happened to be a window fitter, so we came to an agreement whereby he would teach me the basics of window fitting whilst fitting the window; it was 100% a two person job too. It was super useful not to have to buy suction cups to lift the glass and other necessary tools, in addition to learning the basics. After the window was fit, it was the simple task of painting and sealing the frame.
Having fit the window with an expert, fitting the door frame + hanging the door became a much more achievable task. I bought a solid wood fire door blank and trimmed two sides down significantly to fit the aperture. A series of spacers helped me correct any gaps. I then fit a basic Yale latch and a deadbolt at the bottom of the door. All ironmongery in black to be hidden once the cladding was attached.


6.0___Floor, Trench & First Fit Electrics.___
I had originally planned to install a simple concrete screed, but I soon learned that laying any form of concrete on a wooden timber frame was near enough impossible to achieve a good result without cracking further down the line. So I decided to fit marmoleum for it’s hard-wearing properties. So, at this point in the build I was tempted to employ a floor fitter for the marmoleum. But of course, another whopper of a quote came in to fit it, so I took a whack at it myself. I think this installation in particular is something I’ll likely avoid in the future. Everything about it was just a bit tedious. Unrolling the entire roll to avoid ‘yellowing’, Massaging creases out, finding a 60kg roller or equivalent, cutting edges at a 45 degree angle. I’m not sure I did any of those steps to a professional standard but I got it done. And to be honest, the floor is going to be covered in clay most of the time anyway.
Another job I had been putting off was digging the trench. From the entrance of the studio to the back door of the house. Andy and Mark helped on separate days to speed things up for me. I then laid down a very heavy 3-core armoured cable the length of the trench bringing the cable up through a drilled hole in the studio at one end, and under the house at the other. My trusty electrician, Allen and I, then negotiated the cable between the joists in the lounge floorboards to greet the fuse-board. in the middle of the room. I then did the same with the data cable though a little easier to navigate. Once this was done, the build was ready for the first fit electrics, which is where my qualified electrician came in.


7.0___Cladding___
I had the entire eight months of the build to decide how I was going to clad the build, and still couldn’t come to a decision when the time eventually came. After much deliberation, a ton of samples and research I decided to go with high grade Siberian Larch in a super thin profile, which took sometime to source. I then used the Shou Sugi Ban technique to char and seal the wood myself and use it to clad the front only. Aside from it’s beauty, it’s provides a much less flammable exterior to the build, and is generally much more durable and weather-proof. And of course, it also allowed me to achieve a beautiful and consistent dark/matt black finish to the project. It was hugely time-consuming, but very enjoyable.
I used a roofing torch to char every side of each piece which helps prevent any warping, lightly brushed down the the charcoal and finished with a thick coat of boiled linseed oil. Some people crush the wood, and others don’t. I did a bit of both to have a bit more variation with the overall pattern. Brushing the wood brought a rich depth to the wood, where omitting this step would likely leave a more ‘gator’ type of finish when charred thoroughly. I then used a small blow torch to touch up any areas and even out each pieces consistency.
Seeing as cladding in most garden room projects is one of the most expensive components, I decided to use a cheap roofing batten- painted black - to clad both sides and the back, seeing as it was near enough impossible to view anyway; it felt like a good way to offset the cost of the Siberian Larch.